Back to News

Installation of 2in Drawbar Pins UTBK-01 & UTBK-100

May 3, 2024 3:11 pm

Introduction: The correct installation of the drawbar pin WT1201D and WT1101HD plastic lined bushes is required for the drawbar hinge kit to perform as designed. The main function of the hinge kit is to perform as an elasticated joint and there should be no metal to metal contact of the RTB12 and 14 brackets.

Scope of this Bulletin: This bulletin refers only to the WT1201D pin in relation to the Transpecs universal drawbar hinge kits – UTBK-01 and UTBK-100. Other suppliers may have similar products that interchange but that supplier will need to provide any information in relation to their products.

Certification: The UTBK Hinge Kits supplied by Transpecs carry a certification for new installation. This certification provides for a maximum service wear limit of 5% of the original dimensions and profiles, after this the components must be replaced. If non elastic movement is found, the components require inspection and replacement of worn items. The certification is void if the installation instructions have not been followed or parts other than the original equipment items stated on the certificate are used.
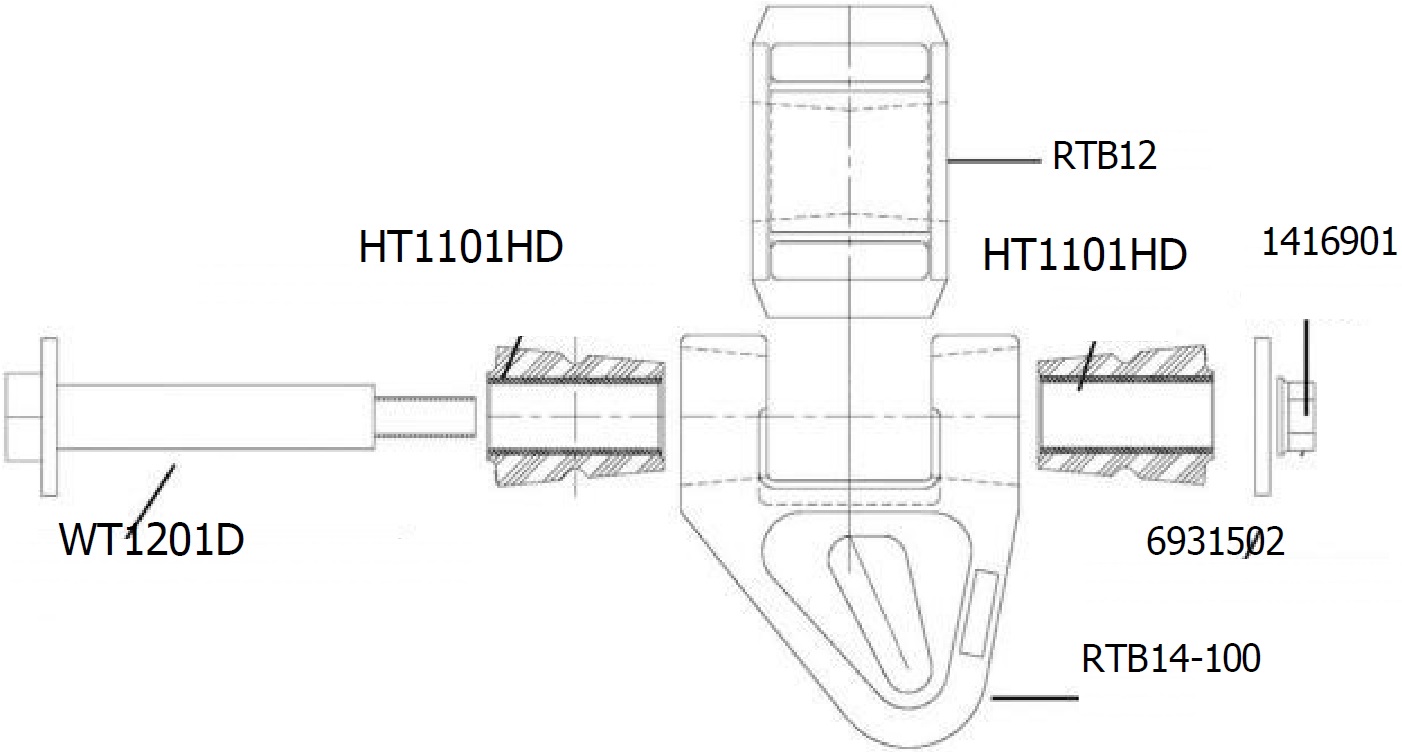
Install 2in Drawbarpins Diagram

UTBK PIN & BUSH INSTALLATION

Installation of Pin & Bushes:

 Ensure the bush mating surfaces on the RTB12 and 14 are free from any oil or other contamination. Install the rubber bushings “HT1101HD” through the outer RTB14 bracket to the inner RTB12. Lubricants are not recommended. DO NOT USE ANY PETROLEUM BASED LUBRICANTS.

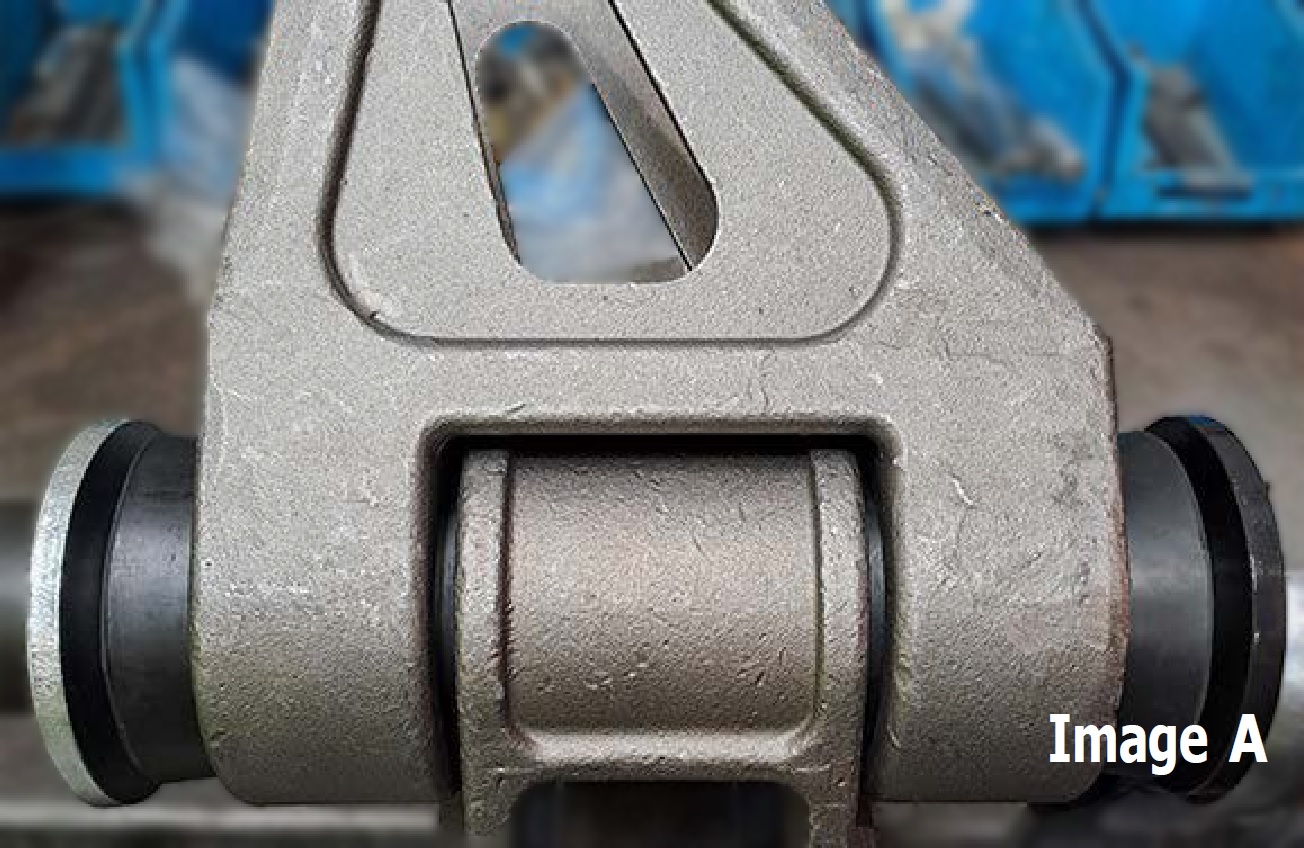
Ensure the gaps between the RTB14 and the RTB 12 are kept equal throughout the procedure as illustrated in Image A. This is essential for correct installation.
Install 2in Drawbarpins Image A

Fit the WT1101HD bushes and the WT1201D, nut and washer. The shank of the pin can be coated in an anti-seize product. Ensure no lubricant is present on the threads or the washer.

NOT USING AN IMPACT GUN, slowly torque up the pin and nut to 250Nm, whilst ensuring the RTB 12 and 14 are kept an equal distance apart and inspect. This securing of this connection should also be done at the natural operating height of the drawbar when it is in service. The WT1201D is designed to be torqued only once, if the connection is undone a new pin must be used.

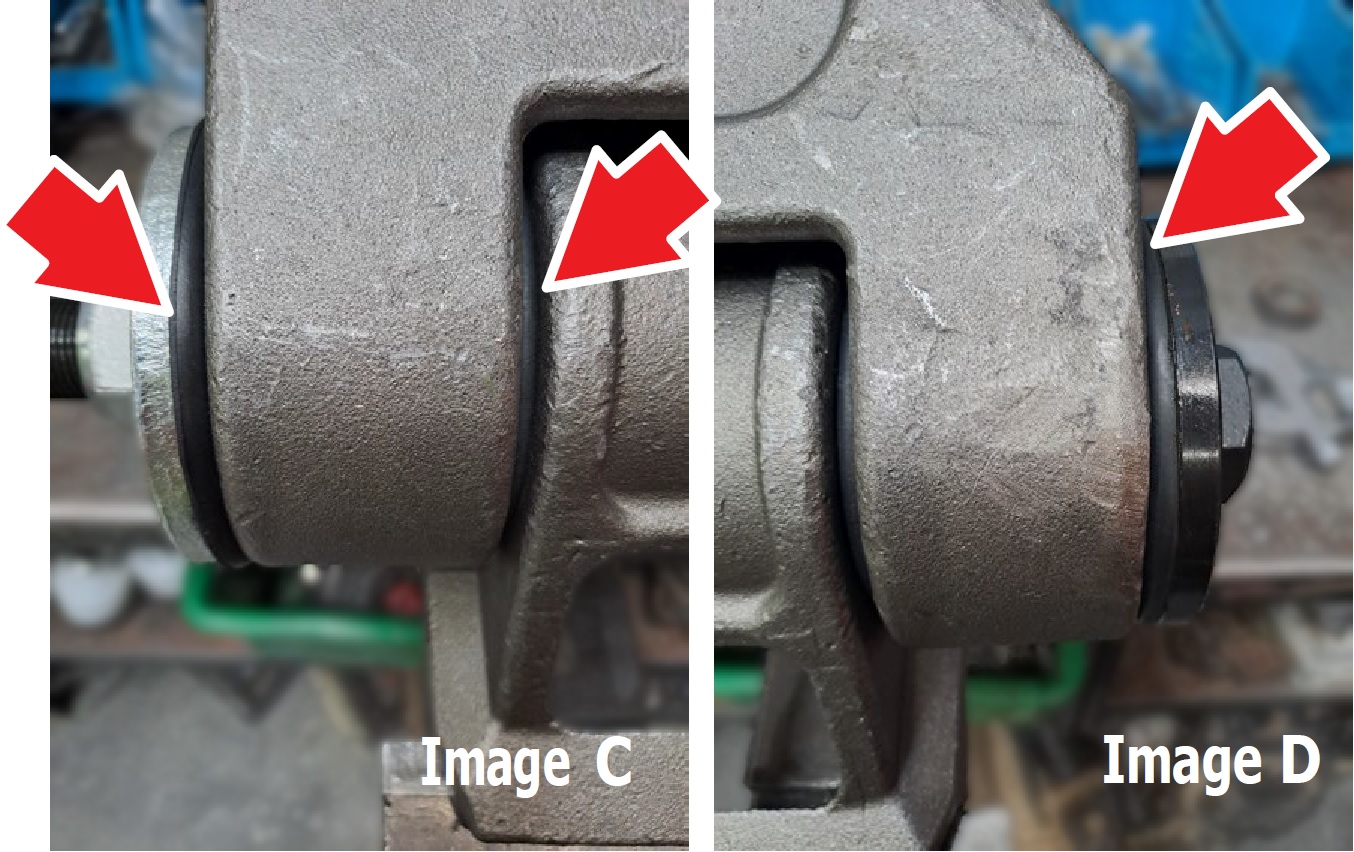
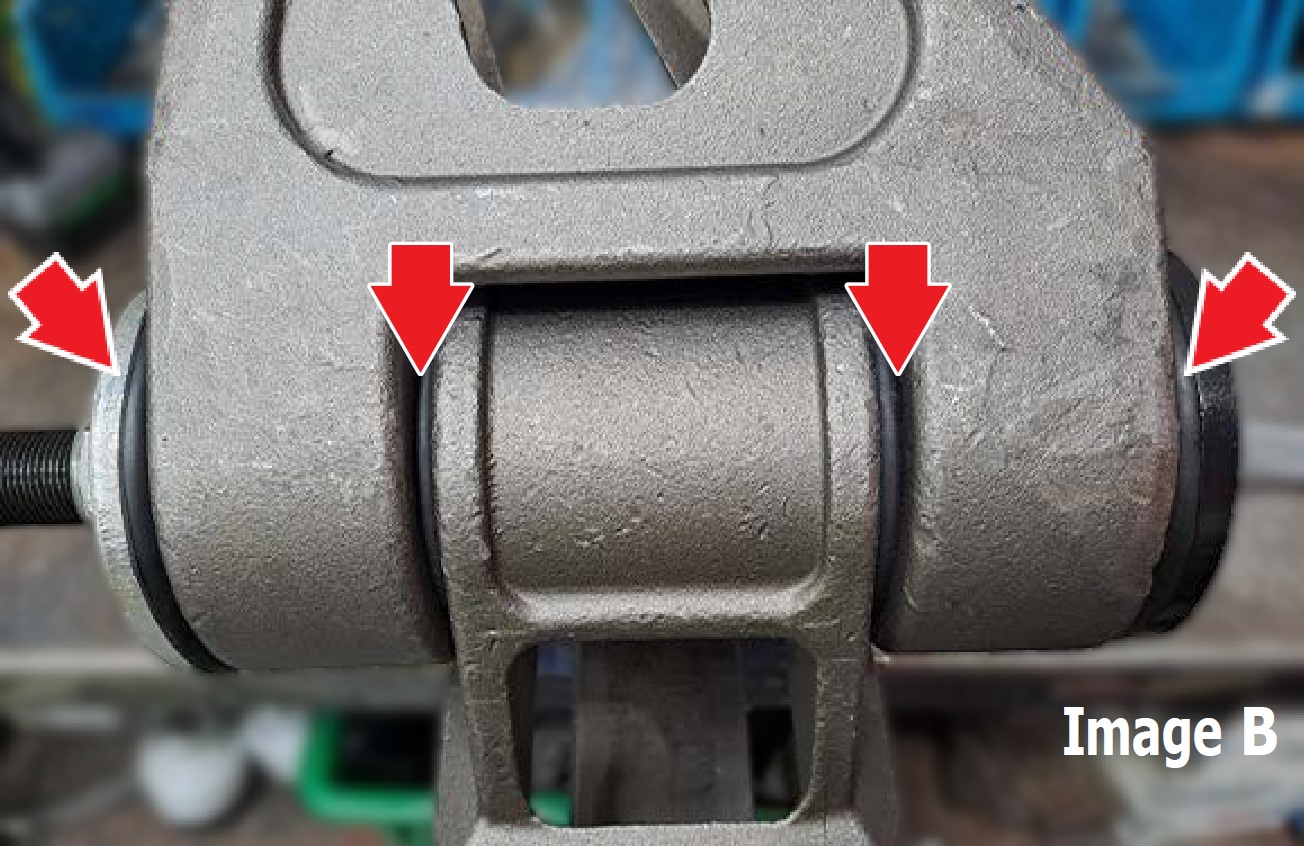
The main reference in the assembly of this connection is not achieving a torque figure. It is to ensure the rubber beads up in the space between the inner and outer bracket as shown in Image B and C. to ensure elasticity. With the HT1101HD bushes this is normally completed at a figure from 250Nm onwards up to 290Nm. There must always be rubber visible between the washers and the brackets as shown in Images B, C and D.

Maintenance:

Daily – A visual Inspection of the hinge components should be carried out on the driver’s walk-around check to identify any loose components and any worn items (e.g. washer touching hinge bracket, loose washer etc).

Vehicle Service Inspection – As well as a visual inspection, the connection should be checked for wear and security on every vehicle service or at least 3 months or 30,000kms whichever is first. If any non-elastic (i.e. loose) movement is found, all components should be inspected for wear and faulty components replaced. Do not just tighten the nut. If undone always use a new pin and nut.

The inspection frequency should be determined by the operator in line with the conditions they operate in, but the UTBK hinge should be inspected at least every 30,000kms or 3 months.

In case of an accident that involves excess force being applied to the drawbar, follow the direction of the certifying engineer, though as a minimum the pin, nut, washer and bushes should be replaced.

Install 2in Drawbarpins Image B

Install 2in Drawbarpins Image Cd

Fit the WT1101HD bushes and the WT1201D, nut and washer. The shank of the pin can be coated in an anti-seize product. Ensure no lubricant is present on the threads or the washer.

NOT USING AN IMPACT GUN, slowly torque up the pin and nut to 250Nm, whilst ensuring the RTB 12 and 14 are kept an equal distance apart and inspect. This securing of this connection should also be done at the natural operating height of the drawbar when it is in service. The WT1201D is designed to be torqued only once, if the connection is undone a new pin must be used.

The main reference in the assembly of this connection is not achieving a torque figure. It is to ensure the rubber beads up in the space between the inner and outer bracket as shown in Image B and C. to ensure elasticity. With the HT1101HD bushes this is normally completed at a figure from 250Nm onwards up to 290Nm. There must always be rubber visible between the washers and the brackets as shown in Images B, C and D.

Install 2in Drawbarpins Image B

Install 2in Drawbarpins Image Cd

Maintenance:

Daily – A visual Inspection of the hinge components should be carried out on the driver’s walk-around check to identify any loose components and any worn items (e.g. washer touching hinge bracket, loose washer etc).

Vehicle Service Inspection – As well as a visual inspection, the connection should be checked for wear and security on every vehicle service or at least 3 months or 30,000kms whichever is first. If any non-elastic (i.e. loose) movement is found, all components should be inspected for wear and faulty components replaced. Do not just tighten the nut. If undone always use a new pin and nut.

The inspection frequency should be determined by the operator in line with the conditions they operate in, but the UTBK hinge should be inspected at least every 30,000kms or 3 months.

In case of an accident that involves excess force being applied to the drawbar, follow the direction of the certifying engineer, though as a minimum the pin, nut, washer and bushes should be replaced.